setelah kita dapat masuk monowall kita akan
melihat menu yang banyak seperti :
* System
o General setup
o Static routes (edit)
* Firewall
o Rules (edit)
o inbound NAT (edit)
o 1:1 NAT
o outbound NAT
* Traffic shaper
o Rules (edit)
o Pipes (edit)
o Queues (edit)
* Interface configuration
o LAN
o WAN
o Optional interfaces
o wireless configuration
* Interface status
* Traffic graph
* Services
o DNS forwarder
o DynDNS
o DHCP
o Captive portal
o Wake on LAN
* VPN
o PPTP
o IPsec (edit)
atau kurang jelas kita dapat mengunjungi : http://.m0n0.ch/wall/screenshots.php
kita bisa memilih screenshot seperti
gambar dari system general setup :http://m0n0.ch/wall/images/screens/system.png
dan juga yang lain
"namun saya belum terlalu bisa konfigurasinya waaupun sudah melihat screenshots
tapi saya benar2 belum bisa setting konfigurasinya tolong kalu bisa say diberitahu secara detailnya atu di beri alamat web "
penjelasan :
pada menu
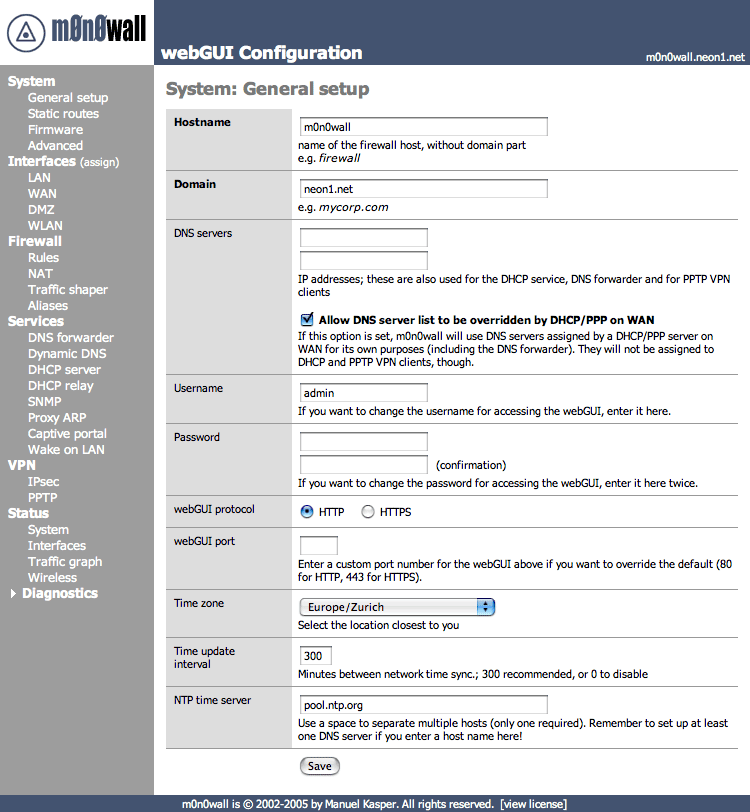
* system general setup
1. kita dapat mengubah host name,domain,dnsserver dan jugausername dan passwordnya,dll
2. gambar :http://m0n0.ch/wall/images/screens/system.png
3. static route :kita dapat menambah routes LAN ,WAN,/PPTP denagn hasil seperti gambar :http://m0n0.ch/wall/images/screens/system_routes.png
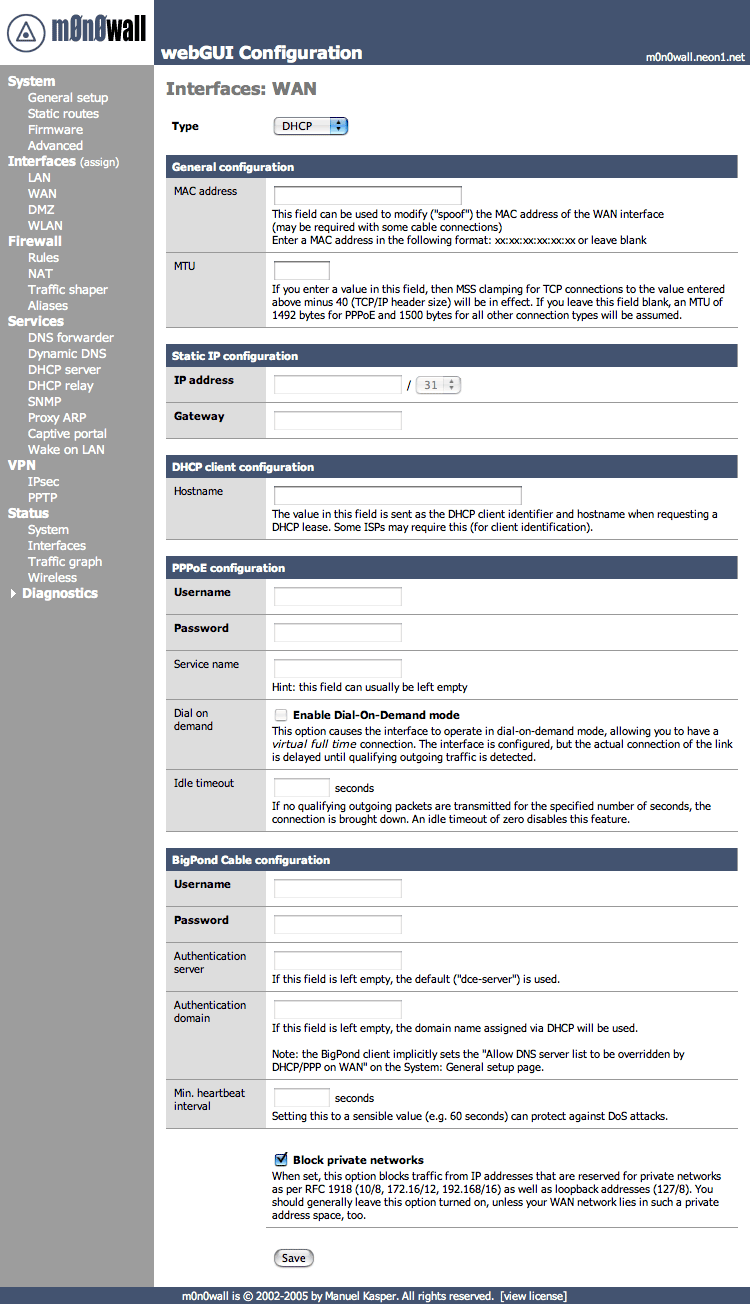
* interfaces
1. didalam interfaces kita dapat mengatur ip LAN dan juga WAN seperti :http://m0n0.ch/wall/images/screens/interfaces_lan.png WAN :http://m0n0.ch/wall/images/screens/interfaces_wan.png
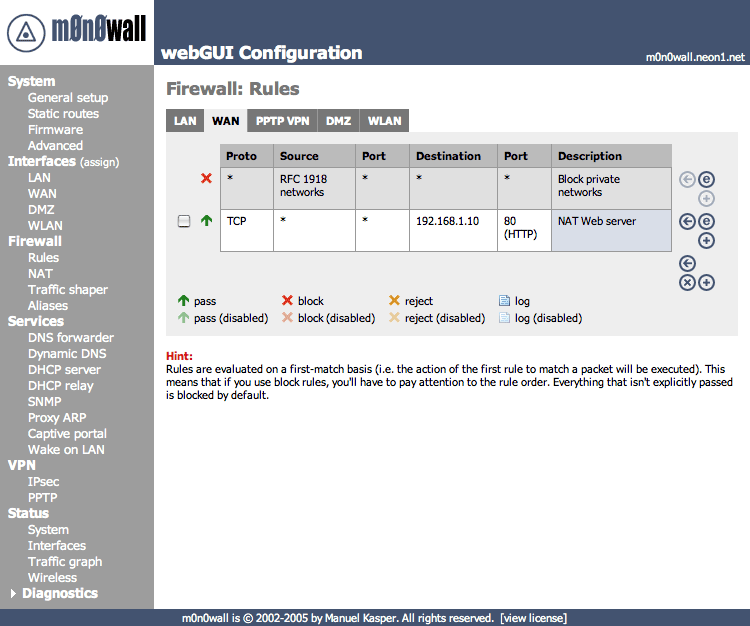
*firewall
- pada firewall kita dapat :
- pada menu rules kita dapat melakukan blok pada port tertentu dari sumber dan tujuan tertentu :http://m0n0.ch/wall/images/screens/firewall_rules.png
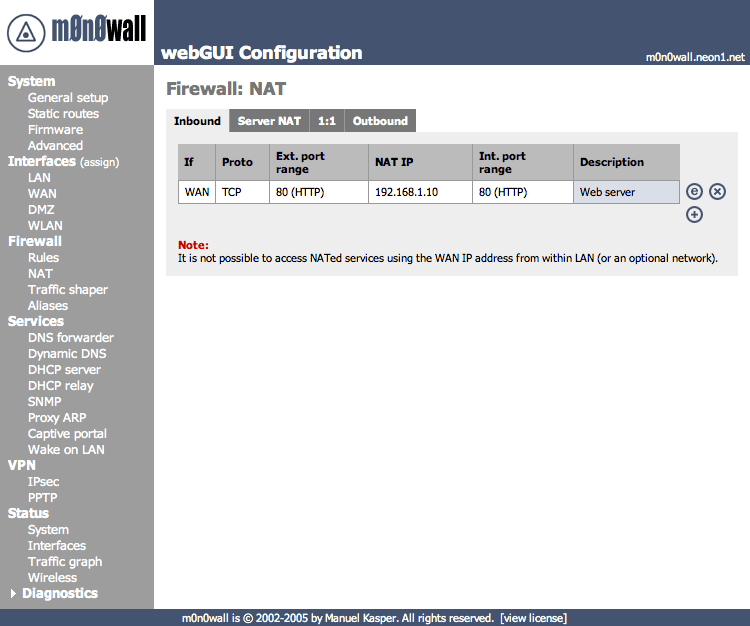
- pada menu nat kita dapat menyetting NAT (Network Address Translation):http://m0n0.ch/wall/images/screens/firewall_nat.png
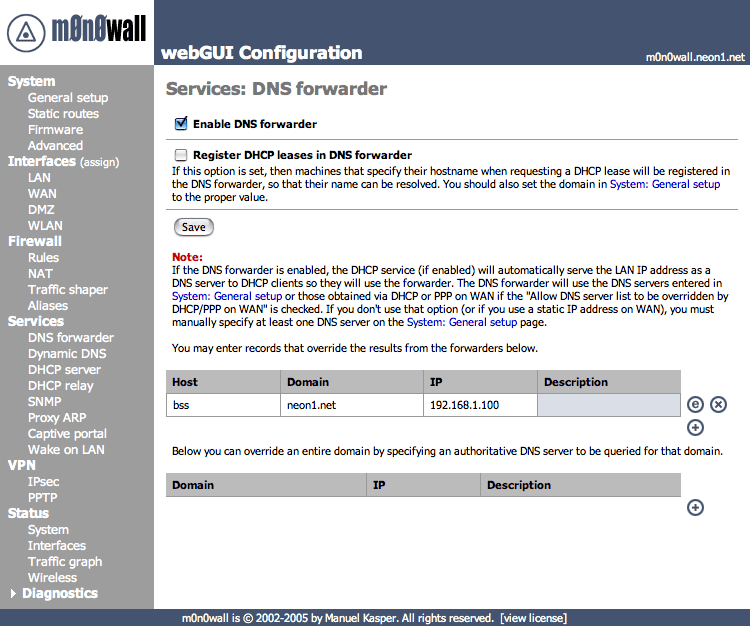
- kita dapat menyetting dns forwarder dan dny dns :http://m0n0.ch/wall/images/screens/services_dnsmasq.png
- kita dapa juga membuat server DHCP: http://m0n0.ch/wall/images/screens/services_dhcpd.png
- kita juga dapat memanage sistem network protokol (SNMP)
- mengedit ARP
- dan proxy
